25 Tips For The Electrical Install of DIY Solar Panels


Guest post by Big Living | Little Footprint
So maybe you’re nearing the end of your DIY solar panel installation, or you’re just starting and doing research. At some point, you’ll reach this step: the solar panel electrical installation.
Electrical work is relatively straightforward if you know how to do it, but there are always some tricks and ways to be better prepared.
We are DIY-ers that did our entire solar panel installation ourselves. We’ve learned a lot from our experience and want to share some tips and lessons with you. So here are 25 tips for solar panel electrical wiring that we learned along the way.
Note: These tips are based on our experience with our products on our roof type, so your conditions could be different. It is always best to review your specific manufacturer's literature.
If you missed it, check out 33 Tips for Installing Solar Panel Mounting Rails, which provides more tips and tricks for the first half of the DIY installation process. Also, for our whole DIY solar panel journey and more tips, check out the Going Solar Series on Big Living | Little Footprint.
Tips on Installing Your Junction Box
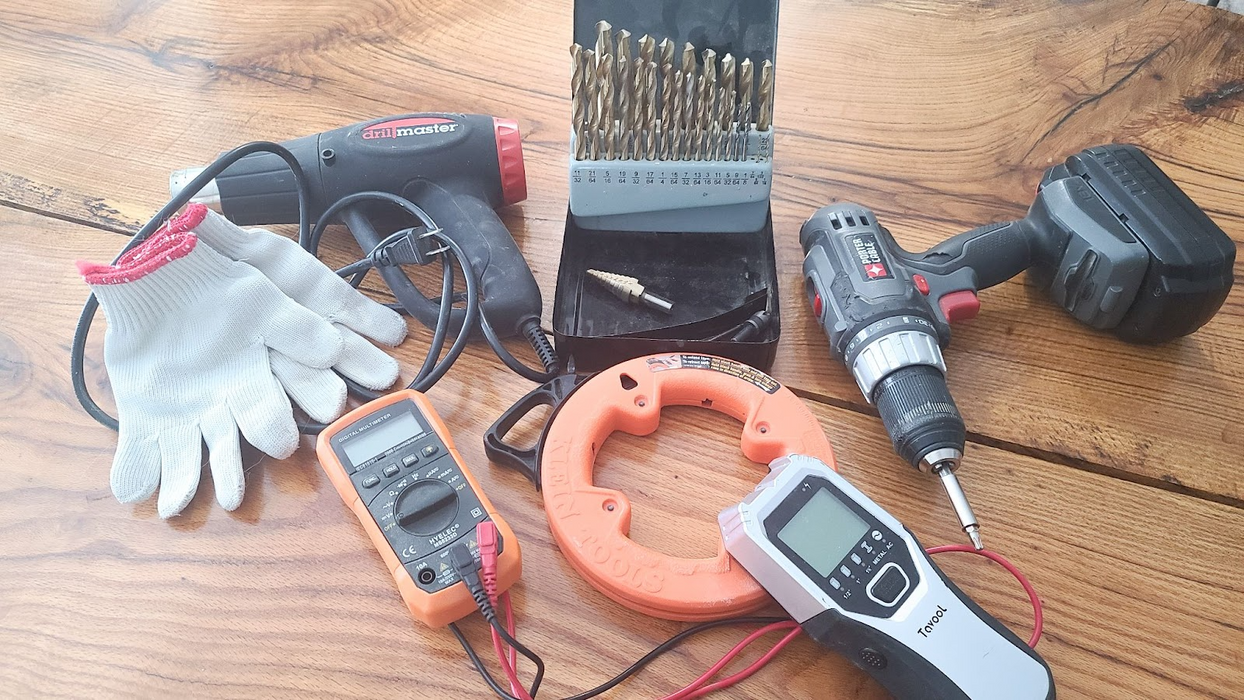
Tip 1: Purchase Step Bits
You’ll likely need to drill a hole for the copper ground wire’s strain relief fitting in your junction box. This is a lot easier if you purchase a set of step bits.
Tip 2: Purchase an Extension Ring
If you are having trouble getting all the wires to fit in the junction box, consider buying an extension ring to give yourself more room to maneuver.
Tips on Installing Your Inverter
Tip 3: Always Shut Off the Power
Always make sure the power is off and disconnected before touching anything electrical. You must use A/C disconnect switches, but shutting power off at your panel is good practice as well.
Tip 4: Always Ground Yourself
When handling the electronics of the inverter and Zigbee board, ground yourself to discharge any static electricity you may have. Touching a large piece of metal is usually a quick way to dissipate any static electricity you accumulated.
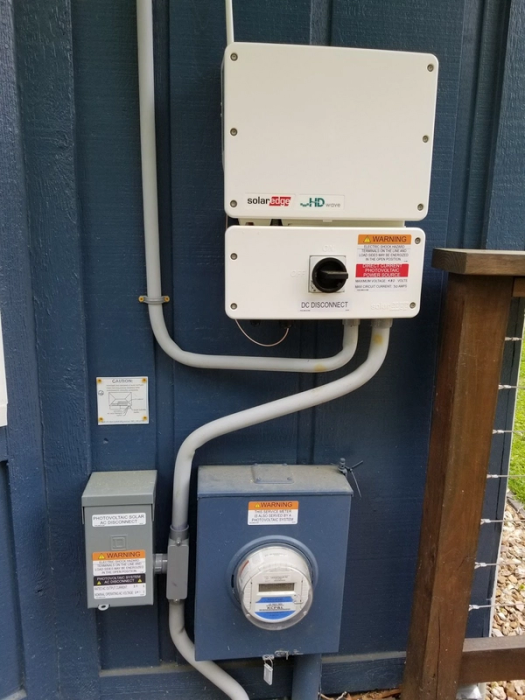
Tips on Running Your Conduit
Tip 5: Practice Bending Conduit First
Practice bending your conduit on scrap pieces before trying on the final piece, and make sure to use the right tools for the job. Bending metal conduit is pretty easy, and you can find a nice bending tool at most big box stores.
Tip 6: Create a Bending Guide From Wood & Screws
If you are planning to bend plastic conduit, a great way to control this is by tracing the desired curve onto a piece of wood. Then put in screws along that curve to pull the pipe against it. Go slowly and heat gradually so you don’t accidentally collapse the conduit wall.
Tip 7: Glove Protection is Necessary
Wear gloves to protect your hands from the hot pipe while forming it.
Tip 8: Bend Small Sections for Tight Curves
If you need to do a tight bend, you’ll want to bend a small section at a time allowing it to compress, relax, and compress further to help keep the walls from buckling.
Another option is to put a malleable sleeve inside the pipe to support the walls. You can remove the sleeve once the bend is complete. Alternatively, if you cap one end, you can blow into the pipe while it is still malleable to pressurize the pipe and reinflate the wall.
Tip 9: Consistent Heating is Key to Bending Conduit
Heat all sides of the pipe, and don’t let your heat gun linger in one spot too long. You can still end up burning the pipe.
Tip 10: Pre-formed Conduit Can Be An Option
If you don’t want to try to bend the plastic or metal conduit, then buying pre-formed pieces can be a good alternative, depending on the geometry of your house.
Tip 11: Double-Check Your Instructions for Sizing
Make sure to consult your plans and custom instructions to know what size of conduit you need.
There will be a conduit schedule on the wiring diagram page that specifies a minimum size. Be sure to verify measurements with a tape measure to ensure you’ll have enough conduit and wire to complete the job.
Tip 12: Account for Pull Boxes Based On Number of Bends
When running the conduit, keep track of the number of bends in your conduit. You will need to include a pull box for every 360 degrees of bends. This is required by code in most places, but it is also good practice as pulling these wires through longer stretches without an additional box can be tricky. You can snap your fish tape if you put too much tension on it.
Tip 13: Always Deburr Your Pipe
Deburr all of your pipes at every cut to prevent tearing the insulation of your wires.
Tip 14: Test Your Conduit Fits Before Applying Cement
Pre-install your fittings into the inverter and A/C Disconnect switch or pull box. Test your conduit run fits before applying any cement and trim ends, or adjust the bends of the conduit as necessary until you can install.
Tip 15: Install a Pull Box at Connection Into Your House
Make sure you install a pull box to penetrate your home to make fishing the wires a lot easier. Additionally, drill a small weep hole into the lowest corner or corners in the pull box so any condensation from your home or potential water penetration from outside has somewhere it can drain.
Tips on Pulling the Wires
Tip 16: Use A Fish Tape And Attach Wires in Hook Shapes
Attach the wires to your fish tape by bending them to create a hook and then taping that hook onto the length of your tape. You’ll want tape under the hook end of the wire and then over it as well. This way, the wire hooks onto your tape and tape is holding the hook down.
I usually add a little extra at the bend of the hook to form a smoother surface so it can’t catch on the lip of the conduit as I begin to pull.
Tip 17: Attach the Wires a Few Inches Apart
Attach each wire like this to your fish tape. However, space them a few inches apart so none of their hooks overlap and you end up with a fat section you’re trying to pull.
Tip 18: Pull Wires with Someone Else Helping
To prevent accidentally pulling the wires too far and having them end up in the conduit, I recommend having someone watch them and tell you when to stop. Or, tie or tape the wires to the rail or conduit (or something else) to physically stop them from pulling too far.
Tip 19: Again, Always Shut Off the Power and Attach Wire Nuts
Be sure to shut off the power to the circuit breaker panel before pulling wires into it. Also, put wire nuts on the wires to ensure they don’t touch anything before restoring power.
Tip 20: Follow the Wiring Instructions & Use Multimeter to Check Polarity
Make sure all power is shut off when connecting wires and work your way from the junction box down to the circuit breaker panel.
Follow your wiring instructions and double-check the polarity from your optimizers and where they connect to the inverter. If you are unsure, leave them disconnected and check their polarity with a multimeter after installing the panels.
Tips on Installing Your Solar Panels
Tip 21: It Takes Two (At Least) To Position the Panels
The hardest part about installing the panels is physically getting them into position.
Be sure to have an extra pair of hands or two to help lift them and hold them in place as you screw them down. Starting at one end of the rails, use your chalk marks to position your panel. Lift the end of the panel and connect its wires to the inverter. If there is enough slack and the wires touch the roof, be sure to tuck the slack into your wire clips.
Tip 22: Positioning the First Panel is Key
Spend extra time on the first panel to ensure it is square to the rail. This will dictate how the rest of the panels will turn out. Then, you can align each additional panel with the top or bottom edge to give you a straight row.
Tip 23: For Multiple Rows, Use a Spacer
If you have a second row of panels, use a spacer between the first and second row for uniform spacing.
Tip 24: Use a Multimeter to Check the DC Wires’ Output
After installing the panels, don’t forget to use your multimeter to check the DC wires from the solar panels in the inverter.
You should read 1v for every panel on the chain if you’re using SolarEdge optimizers. For example, if you have 15 panels on one chain, it should read 15v. If it reads less than 15v, that means one of the panels is not properly connected, is completely shaded, or is malfunctioning.
If you’re using microinverters, you can skip this step as they will not produce any voltage until powered on.
Final Tip
Tip 25: Don’t Forget Your Safety Labels and Placard
The labels and placard are required. You don’t want to fail an inspection because you forgot to order your placard.
-
We hope these 25 tips for DIY solar panel electrical installation are helpful and make your process easier! Good luck with your DIY solar panel installation, and be sure to reach out to the folks at GoGreenSolar if you need more expert assistance.

About the authors: Amanda and Tyler Santoro are the creators of Big Living | Little Footprint, a site focused on helping people live a greener lifestyle. They are constantly doing DIY projects for their house like installing their own solar panels. They also focus on eco-parenting, making sustainable parenting choices and teaching their child to be eco-conscious. Their family strives to live big while still leaving a little footprint on their environment.
You can follow along with them on their journey and all their tips for improving your green living lifestyle.