The Complete DIY Solar Installer Tool List

So, you’ve decided to install your own solar power system. Great! DIY solar panel installation can save you a ton in installation costs. If you’re comfortable climbing on your roof, handy with tools and capable of wiring a household electrical socket, you’ve probably got what it takes to go DIY. Two people can install a solar panel kit in as little as one to three weekends.
As with any project, the job will go much smoother if you have the right tools. Believe it or not, most of the tools you need for installing solar panels haven’t changed over the last few decades.
Here’s our list of the solar installation tools you’ll need to have on hand to install your solar system:
- Basic hand tools and supplies
- Measuring tools
- Safety equipment
- A sturdy ladder
- Power drill/driver
- Power saw
- Solar panel hanger
- Fully-charged battery or extension cord
- Flat pry bar
- Caulk gun
Learn more: DIY Solar: Is It Worth It? Pros and Cons
Basic Hand Tools and Supplies
Most of the equipment, tools and supplies you need to install solar panels will come in handy for any other DIY project. Our list of recommended tools (and their uses) includes:
- Screwdriver: For tightening grounding lugs
- Pliers: To help manipulate copper grounding wire
- Hammer: A hammer often works better than a stud finder to find roof rafters
- Knife or cutting tool: To open the tubes of roof sealant (unless your caulk gun has a slicer)
- Rags: For wiping up extra glops of roof sealant
- EMT conduit bender: Sometimes you can get through an install without bending conduit if you have premade bends, but you’ll likely need to make at least one angle manually.
- Channel locks: For tightening all conduit joints
- Fish tape: For pulling wires through walls and electrical conduit
- Wire cutters and wire strippers: If you don’t plan to hire an electrician to wire your panels after installation, you’ll have to wire them yourself. Wire strippers and cutters enable you to finish the job quickly.
- Sunscreen: Working outside requires sun protection! Get – and use – sunscreen with SPF 30 or higher, and reapply throughout the day on your arms, legs, face and the back of your neck.


Pro tip: Check everything while at ground level to avoid extra trips up and down the ladder. The first trip is easy, but by ladder climb number ten, you will be cursing your lack of planning!
Measuring Tools
You and your neighbors (and possibly your HOA) will appreciate it if you install your solar panels square and level. Therefore, you’ll need a measuring tape, chalk line, string line, level and squaring tool on the roof to make that happen.

Safety Equipment
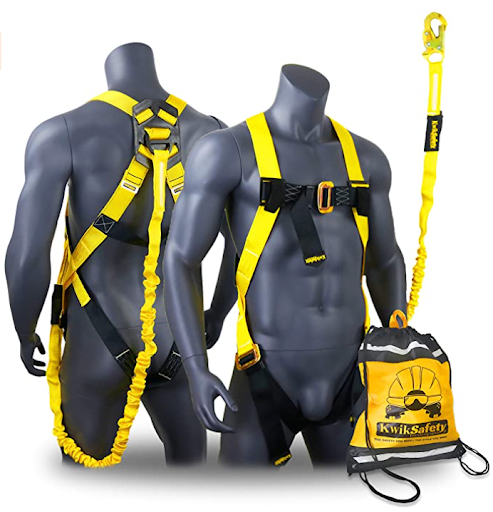
Installing a solar panel system will require lifting, climbing and cutting. Using appropriate safety equipment is a must to protect yourself and those around you.
- Safety harness: Climbing on and off rooftops increases the chance that you might fall and sustain serious injuries. If you’re working at heights of six feet or more, we strongly recommend investing in a safety harness.
- Safety glasses: Safety glasses protect your eyes from glaring sun and debris that could hurt your eyes and cause a serious accident. Safety glasses must be ANSI Z87.1 approved and impact resistant.
- Gloves: Give your hands more grip strength and protect them from cuts and scrapes.
- Safety helmet: Again, when working at heights of more than six feet, it’s a good idea to protect your head in case of a fall.
- Protective footwear: The right shoes matter if you’re climbing up ladders and onto potentially slippery roof tiles. Choose steel-toe shoes that feature slip-resistant outsoles for traction.

A Sturdy Ladder
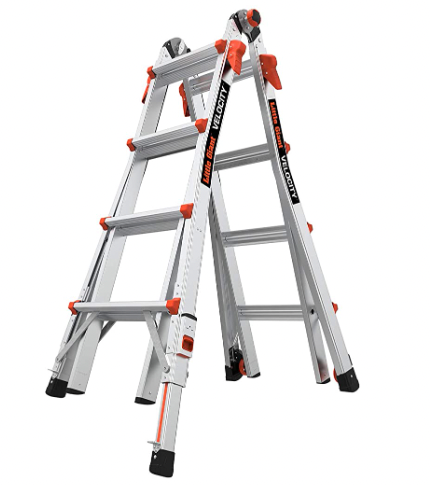
If you haven’t dragged your ladder out in awhile, you may be surprised to find that it’s wobbly or in need of repair. Make sure your ladder is strong and tall enough to reach your roof – with room to spare. If you’re standing on the top rung, it’s time for a new ladder.
Also, don’t take your chances with a wooden ladder!
Power Drill/Driver
Power tools for roof work will include a drill/driver for drilling the pilot holes, driving in lag screws and tightening racking bolts.
When tightening down the module clamps, use a torque driver with a torque setting and not an impact driver. If the clamps are too tight, the module glass can crack.
Also, make sure you have the correct size drill bit and sockets in your tool belt. Be aware that not all racking pieces use the same size socket and some may need deep well sockets.

Power Saw
A power saw is a must for cutting the rails. A portable band saw is great for this, but you can make do with almost any saw. Most installers cut the rails after the modules are installed, so choose a saw that will give you enough control to cut the rails without harming the roof.
Solar Panel Hanger
Solar panel hangers are new on the market, allowing you to hold and position 50-pound solar panels while on a rail, reducing the risk of the panel falling off your roof (and ruining your whole day).
Fully-Charged Battery or Extension Cord
Ideally, cordless tools are preferable if you have them. However, if you don’t, make sure your extension cords are long enough to reach far distances safely.
Flat Pry Bar
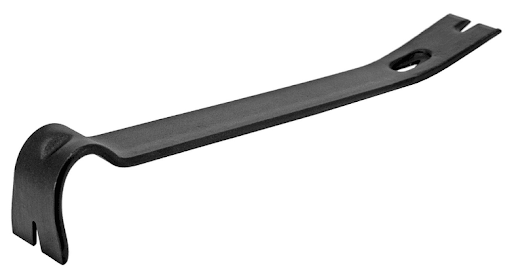
A less common tool, a flat pry bar breaks the shingle seal so you can slide flashing under it once you lift a shingle to install your mounts.
Caulking Gun
A caulking gun is used to apply roof sealant, preventing your roof from leaking after all the holes are drilled to attach your racks and solar panels to your roof.

Read Solar Panel Installation Tips For Your DIY Journey
Choose GoGreenSolar For Your DIY Solar Project
Now that you have everything you need to install your solar panels, what’s stopping you? In addition to taking advantage of tax credits, reducing or eliminating your electric bill, and reducing your carbon footprint, saving thousands of dollars through DIY installation makes it all worthwhile.
For more guidance on DIY solar panel installation, look no further than the experts at GoGreenSolar. Our solar veterans can help you through the decision, purchase and PV installation processes — end to end, every step of the way.


